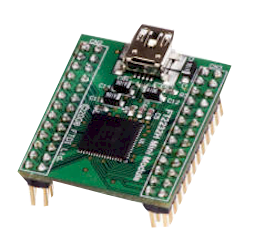
The FT2232H USB module has two input/output ports, either of which can be configured to be one of several device types.The factory configuration is two uarts (serial ports). For DigiLite, the first port needs to be configured as a FIFO (first in first out byte memory).
Preparation
Do not insert the dsPIC chip until the FT2232H module has been configured.Download and unzip the FT2232H VCP (not D2XX) drivers from here:
http://www.ftdichip.com/Drivers/VCP.htm . Note where you have saved them.Download and unzip the FT2232H Configuration program (FT_PROG) from here:
http://www.ftdichip.com/Support/Utilities/FT_Prog_v2.4.zip
With the FT2232H installed in a serialiser, connect it to a USB port on the PC.Give the location of the drivers when asked. You will need to do this several times until all the components of the FT2232H drivers have been installed.
Editing the Configuration
With the FT2232H connected, run FT_PROG (FT_PROG needs Microsoft .Net Framework 3.5
You will be prompted to allow this to be installed if it is not already on your PC. It may be several 10s of MB). Make sure that the EEPROM tab at the top of the window is selected.Click DEVICES and then SCAN AND PARSE. The FT2232H should be detected. If there are other USB devices from the same manufacturer connected, click on the DEVICE line for each device in the left hand box until the FT2232H is found.
(If you get an error message here it may mean that the two sets of drivers are not in ok.See here** and Reinstall)
In the left hand box, click USB Config Descriptor
In the right hand box, set Max Bus Power to 250mA.In the left hand box, click USB String Descriptors
In the right hand box, tick Serial Number Enabled.
In the right hand box, untick Auto Generate Serial No.
In the right hand box, set Serial Number to DATV
In the left hand box, click on the + sign next to Hardware Specific
In the left hand box, click on the + sign next to Port A
In the left hand box, click on Hardware on the next line down.
In the right hand box, select 245 FIFO.
In the left hand box, click on Driver on the next line down.
In the right hand box, click on Virtual Com Port (if not already selected).
In the left hand box, click on the + sign next to Port B
In the left hand box, click on Hardware on the next line down.
In the right hand box, select RS232 UART (if not already selected).
In the left hand box, click on Driver.
In the right hand box, click on Virtual Com Port (if not already set)